Access protection allows you to protect your content and events so only a select group of people can access it, based on them having a valid email address or email domain based on an allowed list. This will allow you to share more confidential information with prospects, customers and employees in a content track or a VEX event without the worry of someone viewing it who shouldn’t be.
Set Up Access Protection
To begin using access protection, complete the following set-up steps.
Note: To modify the appearance of Access Protection messages to match your branding, refer to Introduction to Themes, How to Create/Configure a Theme File.
Create Groups
First you’ll define allowed lists of people who can access specific PathFactory Experiences (Standard and Templated).
- Select
 Gear > Access Protection.
 - Select an existing group you wish to modify or add a new group. Each group is an allowed list that you can apply to Experiences you build in PathFactory.

Add a Group You can apply one or more groups as allowed lists to specific Content Tracks, Explore Pages, or VEX Events. Maintaining clear groups with obvious purposes keeps things organized and helps multiple users know which group to apply to the Experience they’re building. Examples of common groups are a list of customer email domains, a list of registrants for an event, or specific email addresses of decision makers in a sales cycle.
- Add the email addresses or domains of the individuals you would like to grant access to by clicking Add Domain. In the dialog that opens, you can add by manually typing it in or pasting a comma or space separated list into the input field.
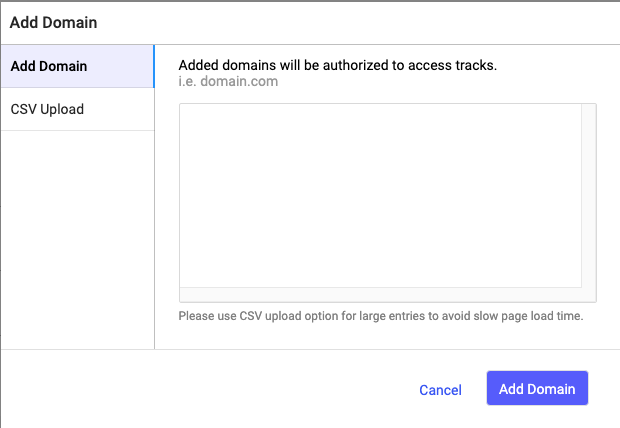
Add a Domain When you are finished, click Add Domain to lock them in. You can edit or delete these values at any point.
Note: Anyone who has an email address in the Domains list or the Email Address list will be able to access the content. In the example above, when Katie’s Group is added to a content track or event, anyone with a PathFactory.com email will be able to access as well as katie@example.com.
Customize the Language
Once you have set up your groups, you can set up your languages for the messages visitors will receive when there is access protection applied to a content track or event.
- Select
 Gear > Languages.
 - On the screen that opens, select the Access Protection tab.
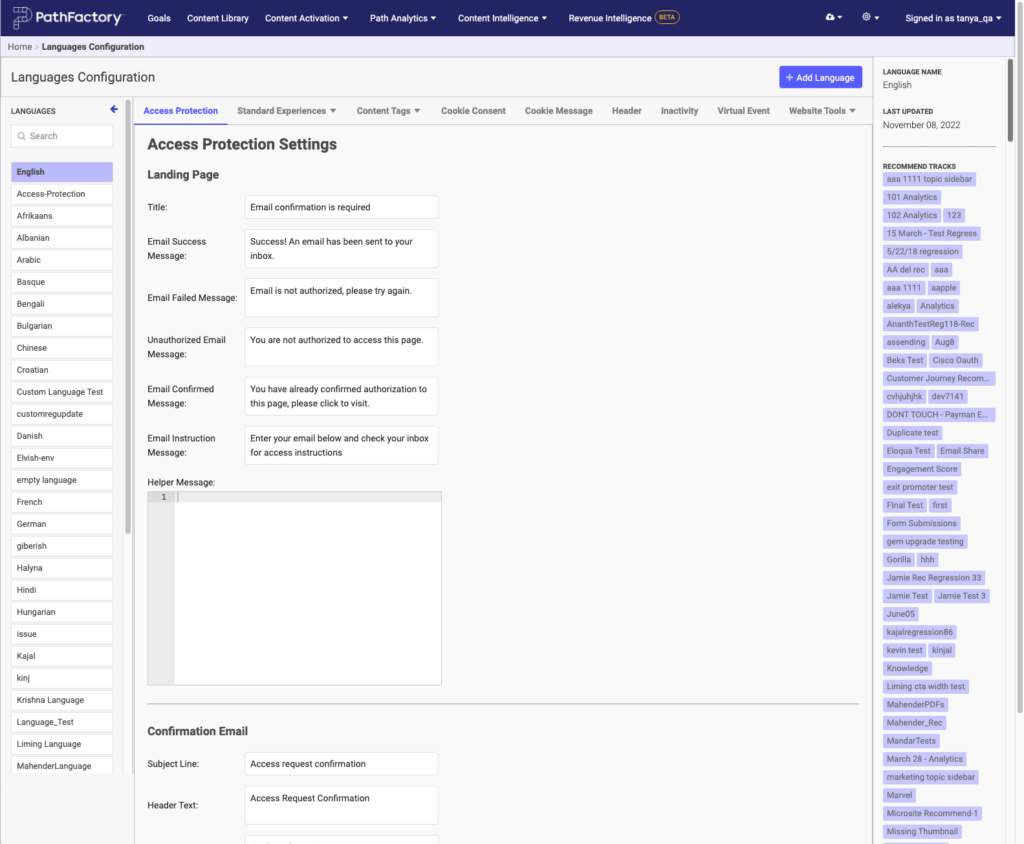
Access Protection tab settings - In the left sidebar, select the language group your Experiences will use.
- Customize all the messages a visitor might encounter on the landing page and in the confirmation email.
Let’s review each message type for the landing page.
- Title: The title a visitor will see when they try to access a protected track/ event
- Email Success Message: The message a visitor will see when they have entered an email address that is in the list of email address/ domains entered in the group
- Email Failed Message: The message a visitor will see when they enter an email address that doesn’t exist in the group list
- Unauthorized Email Message: The message a visitor who is not a member of the allowed group will see
- Email Confirmed Message: The message a visitor will see when they have already gained access to the track/ event and need to go to their email to click the link to access
- Email Instruction Message: The message a visitor will see when they try to access a protected track/ event
- Email Body Content: The message a visitor will get in the email they receive for successfully gaining access to the track/ event
- Helper Message: The message that appears when a visitor is trying to access a track under the button to help them through the process
Let’s review each message type for the confirmation email.
- Header Text: Copy for the header of the email’s body content. This is not the subject of the email.
- Body Content: Copy for the body of the email.
- Button Text: Label for the button visitors must click in the confirmation email.
Customize the Appearance
Determine the look and feel of the message. You have extensive options to control the design, appearance, and branding of your access protection emails for tracks, microsites, and VEX sessions. Customization will help to ensure your visitors feel confident engaging with both the form and automated email link that is sent to access your Experiences.
- Select
 Gear > Appearances.
 - From the on-page navigation, select Access Protection. You may have to select More to see this option.
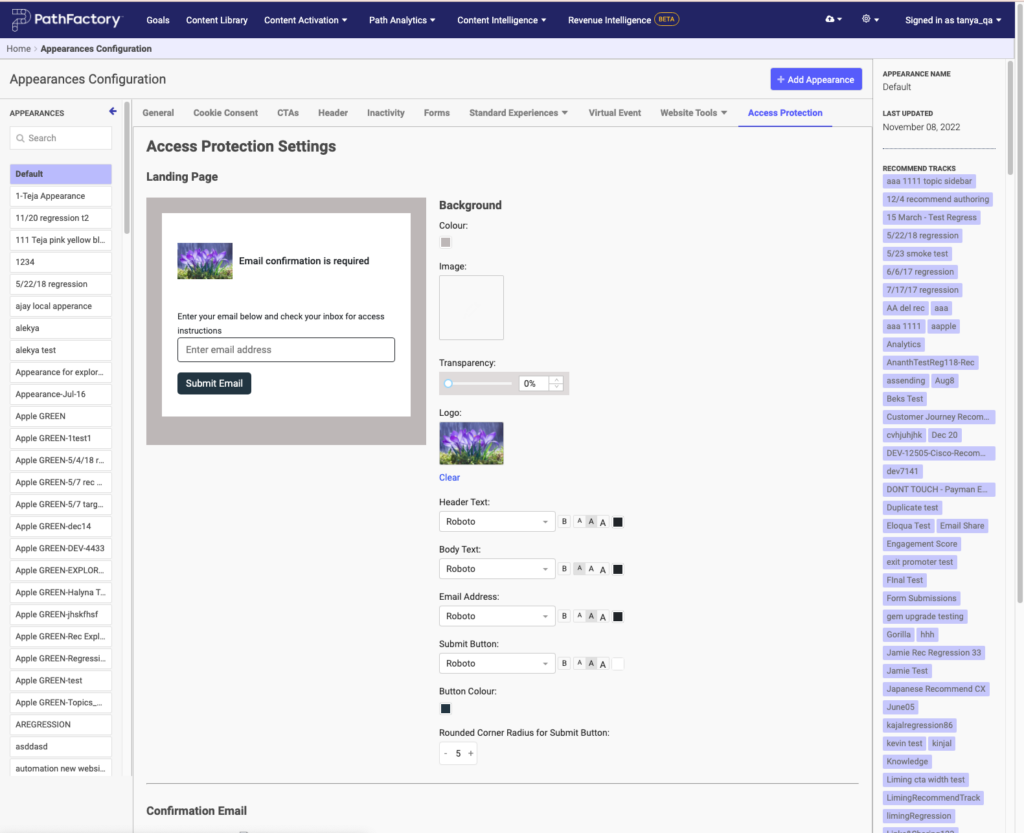
Appearance settings for Asset Protection - From the left sidebar, select the appearance your PathFactory Experience will be using.
- Work through all the options, customizing the font and colors of the landing page message and email. The live preview on the left updates with your choices.
- When you’re happy, select Save Access Protection Settings.

Save settings button
Customize Sender Name
Finally, you can customize the sender name of the confirmation email. By customizing the name, your visitors can clearly see who the email is from and feel comfortable engaging with it.
Note: To do this, your sender email domain must first be set up by PathFactory support.
- Click on your login name in the top right of the screen. Then click Organization Settings.
- From the on-page navigation, select Access Protection tab. (You may have to select More to see this option.)
- In Sender Name, enter your desired name.

Sender name field - Select Save.
How to Add Access Protection to a PathFactory Experience
Once you have configured the content for an Experience, you should add access protection to the Experience.
Add Access to a Standard Experience
Navigate to your content track. In the left sidebar, under Track Settings, set the language and access protection.
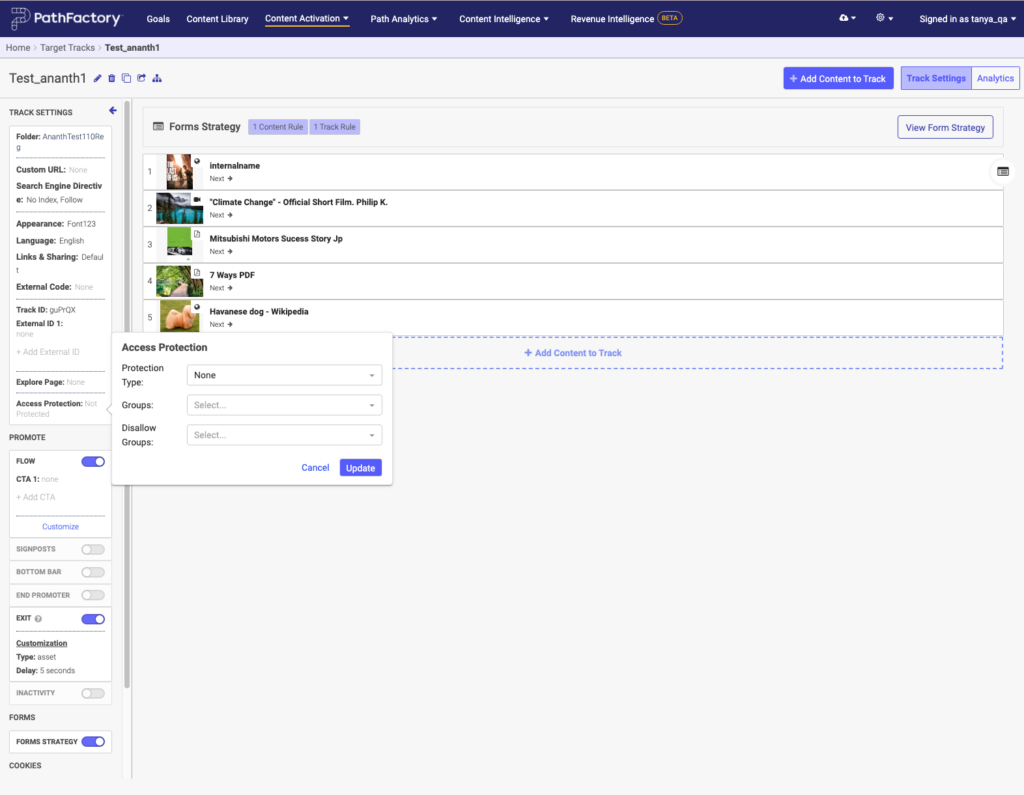
Add Access to a VEX event

In a Virtual Event, select your event, click the Event Setup tab, scroll to the bottom of the page and add the language. Then add the group(s) you wish to restrict the event to, then click Save.

Add Access to a Templated Experience
You can create groups and allow them access to the Content Page and Landing Pages in your Templated Experience. You can find out more about Templated Experience by reading Introduction to Template Experiences. To add access to your Experience, follow these steps.
1. Open the Templated Experience for which you want to edit access.
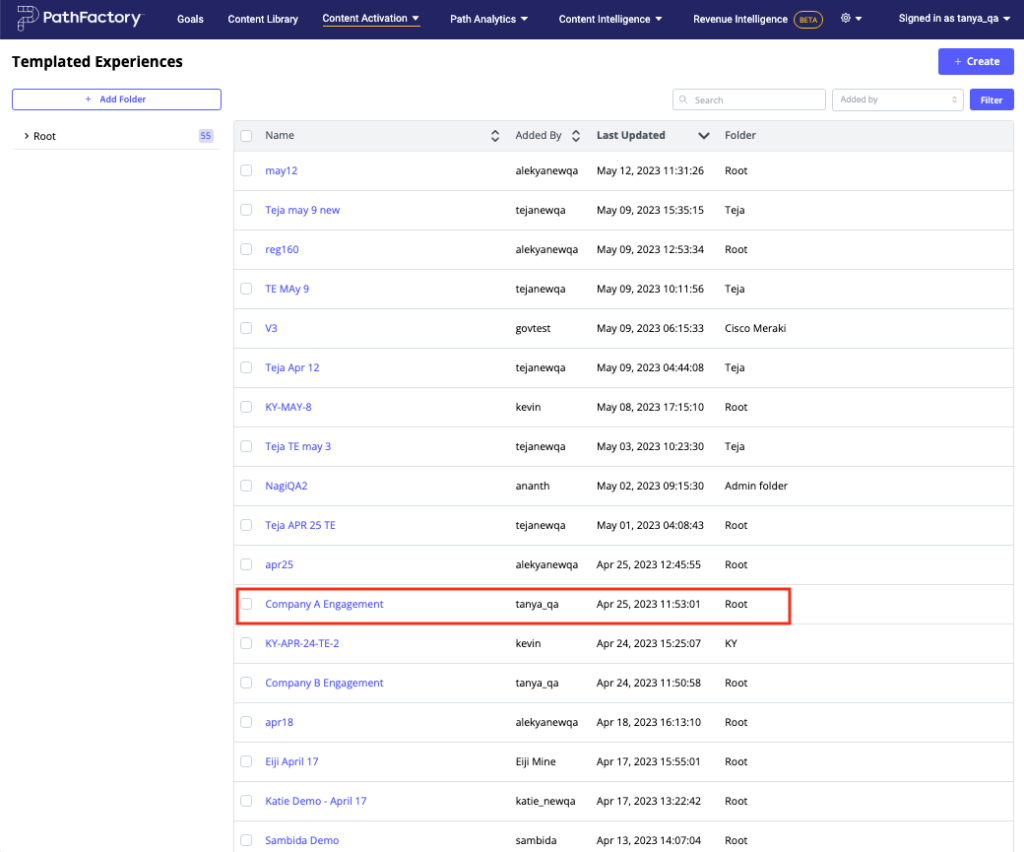
2. Open the Experience and then click on the Details tab. Click the Edit button to modify the Access Protection, as shown outlined in red on the screen capture below.
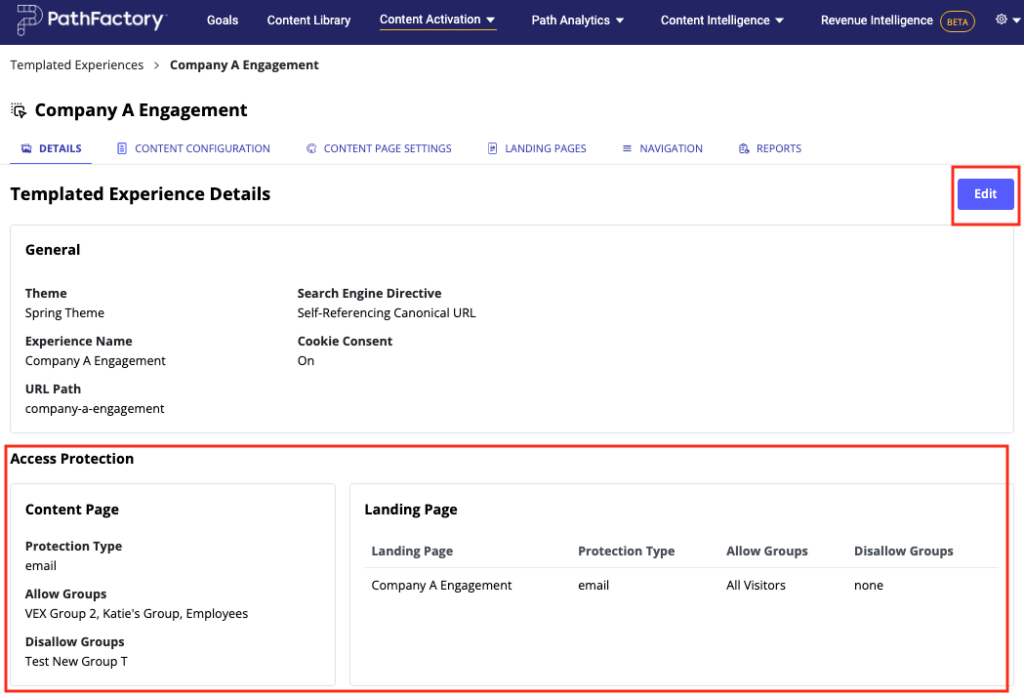
3. The Edit menu for Access Protection opens. You now can edit access for Content Page and Landing Pages for your Templated Experience.
4. For the Content Page access, select the Protection Type – Email or None. If you select Email, your viewers will see a prompt to submit their email for verification before they are granted access to this Templated Experience. If you select None, your viewers will not need any special access to view this Templated Experience.
Note: If you choose no protection, and do not add Allowed Groups or Disallowed Groups, all viewers will be able to see this Templated Experience. By adding Allowed Groups and Disallowed Groups in the next steps, you are providing access for specific groups of users.
5. For the Allow Groups list, click the arrows to select the groups for which you want to provide access to this Templated Experience. These are groups that you or someone else within your organization has created.
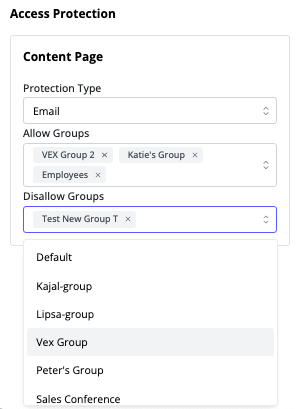
6. Do the same for the Disallow Groups, as shown in the screen capture below. You can choose to add groups to Allow Groups or to Disallow Groups, or both.
7. Next, create or edit an access rule for your Landing Pages in this Templated Experience.
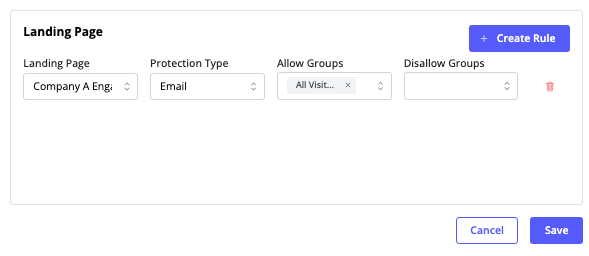
8. From the dropdown lists available, select the Landing Page, Protection Type, and Allow Groups and/or Disallow Groups.
9. To add a rule, click +Create Rule. To delete a rule, click its associated trash bin.
Visitor Access Feedback for Experiences
This section describes the feedback a visitor receives within various access scenarios for Standard and Templated Experiences.
- Visitor Needs to Verify Email Address
If a visitor submits an email address (at the prompt) that is in the Allowed Group, the visitor receives the confirmation email message (customizable – see above) from support (support@pathfactory.com) with the link to access the Experience. The visitor must then click this link to validate that they are the owner of the email address. Once they click the link in the email they will gain access to the Experience.
- Visitor is Part of Allowed Group
If a visitor goes to access the Experience and you have not set up email confirmation as required, the visitor immediately gains access to the Experience. - Visitor Enters Wrong Email Address
If a visitor enters an email address (at the prompt) that does not match the Allowed Group domain, the visitor will get a warning message and can try again with a correct email address.
- Visitor is Part of Disallowed Group
If a visitor tries to access a PathFactory Experience but you have added them to a Disallow Group, the visitor will see a message telling them they don’t have access to this content.
