Table of Contents
1. Overview and Prerequisites
2. Planning
3. Programs
4. Streams
5. Smart Lists
6. Smart Campaigns
Optional Steps:
7. Persona Personalization
Overview
By the end of this guide, you’ll have built an On-Demand Nurture Program that has Skip Logic, Dynamic Cadence, and ensures your leads are delivered the right content at the right time. We’ll also show you how to easily personalize your nurture by persona.
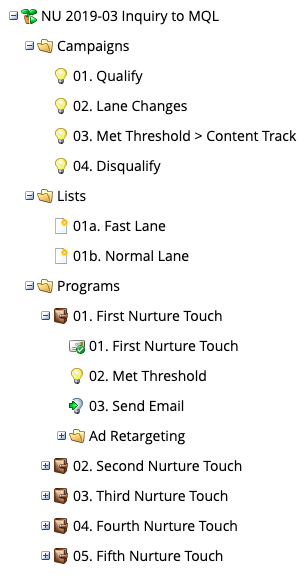
By the time you’re finished this guide, here’s what your Nurture Program will look like:
Prerequisites
- PathFactory instance
- Marketo account
- 1 Score Field called # of Nurture Emails Sent
Planning
Before building your Engagement Program in Marketo, you’ll want to make sure you’ve mapped out your Nurture Emails, added your content to PathFactory, and created a Content Track in PathFactory.
Your strategy will vary depending on your level of experience with PathFactory. We recommend connecting with your CSM to discuss the best options for you. You could consider creating one Content Track for each Engagement Program using Target & Recommend, or using multiple Content Tracks per Engagement Program.
If you’re a beginner, we recommend creating one Content Track for your Engagement Program. Here’s an example from our Marketing:
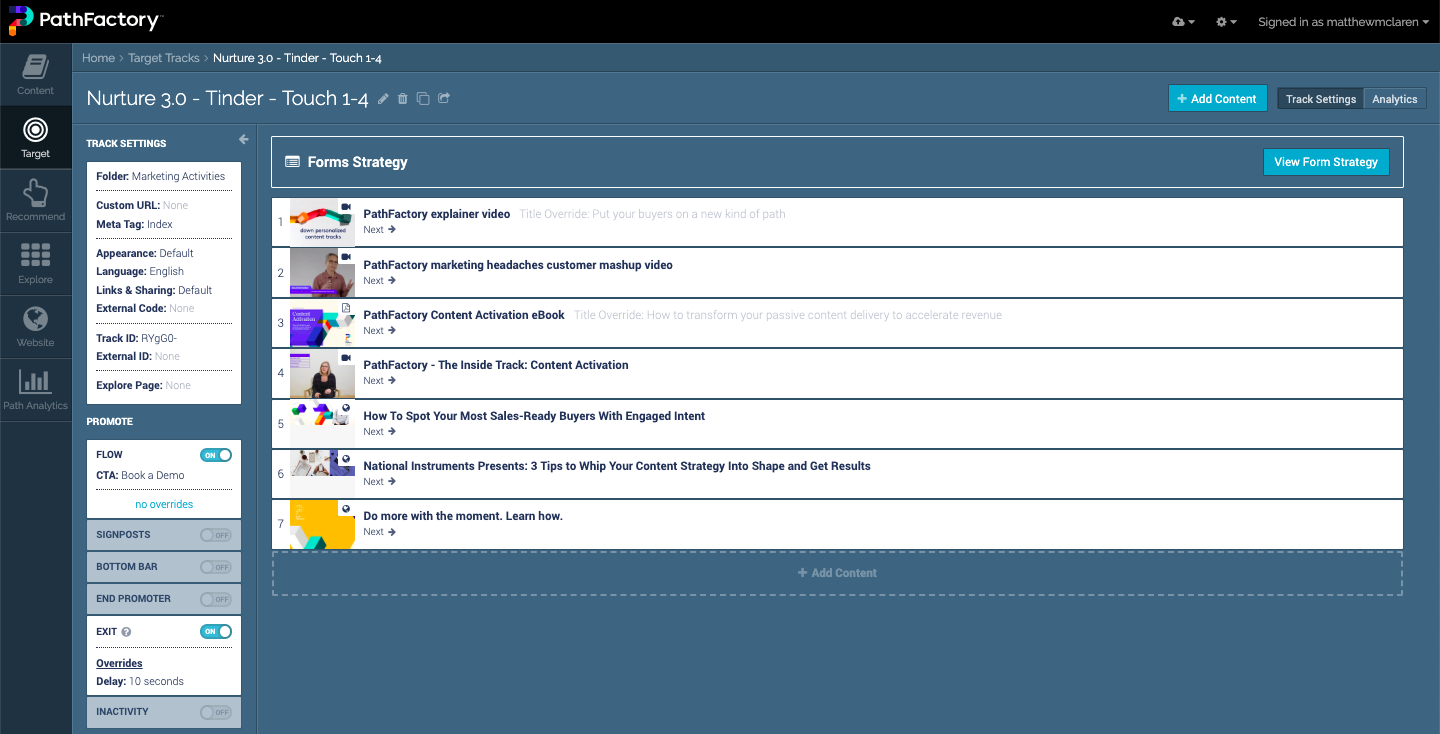 Example of a Content Track
After you’ve created your Content Track, make a list of each Nurture Email with its associated PathFactory Email Tracking Link and PathFactory Custom URL Slug. You’ll need this information when building your Engagement Program in Marketo, so you’ll appreciate having it readily available.
Here’s an example of how you could organize your content:
| Nurture Email | PathFactory Email Tracking Link | PathFactory Custom URL Slug |
|---|---|---|
|
01. First Nurture Touch |
https://nurturenow.pathfactory.com/c/on-demand-marketing-?x=J2uHzB&lb_email={{lead.Email Address}} |
on-demand-marketing- |
|
02. Second Nurture Touch |
https://nurturenow.pathfactory.com/c/abm-wins-how-invoca-?x=J2uHzB&lb_email={{lead.Email Address}} |
abm-wins-how-invoca- |
|
03. Third Nurture Touch |
https://nurturenow.pathfactory.com/c/4-bad-b2b-content-ex?x=J2uHzB&lb_email={{lead.Email Address}} |
4-bad-b2b-content-ex |
|
04. Fourth Nurture Touch |
https://nurturenow.pathfactory.com/c/3-tips-marketers-can?x=J2uHzB&lb_email={{lead.Email Address}} |
3-tips-marketers-can |
|
05. Fifth Nurture Touch |
https://nurturenow.pathfactory.com/c/all-in-on-abm?x=J2uHzB&lb_email={{lead.Email Address}} |
all-in-on-abm |
To find your Email Tracking Link, select the Asset in your Content Track and the option will become available in the right details panel (highlighted in yellow below):
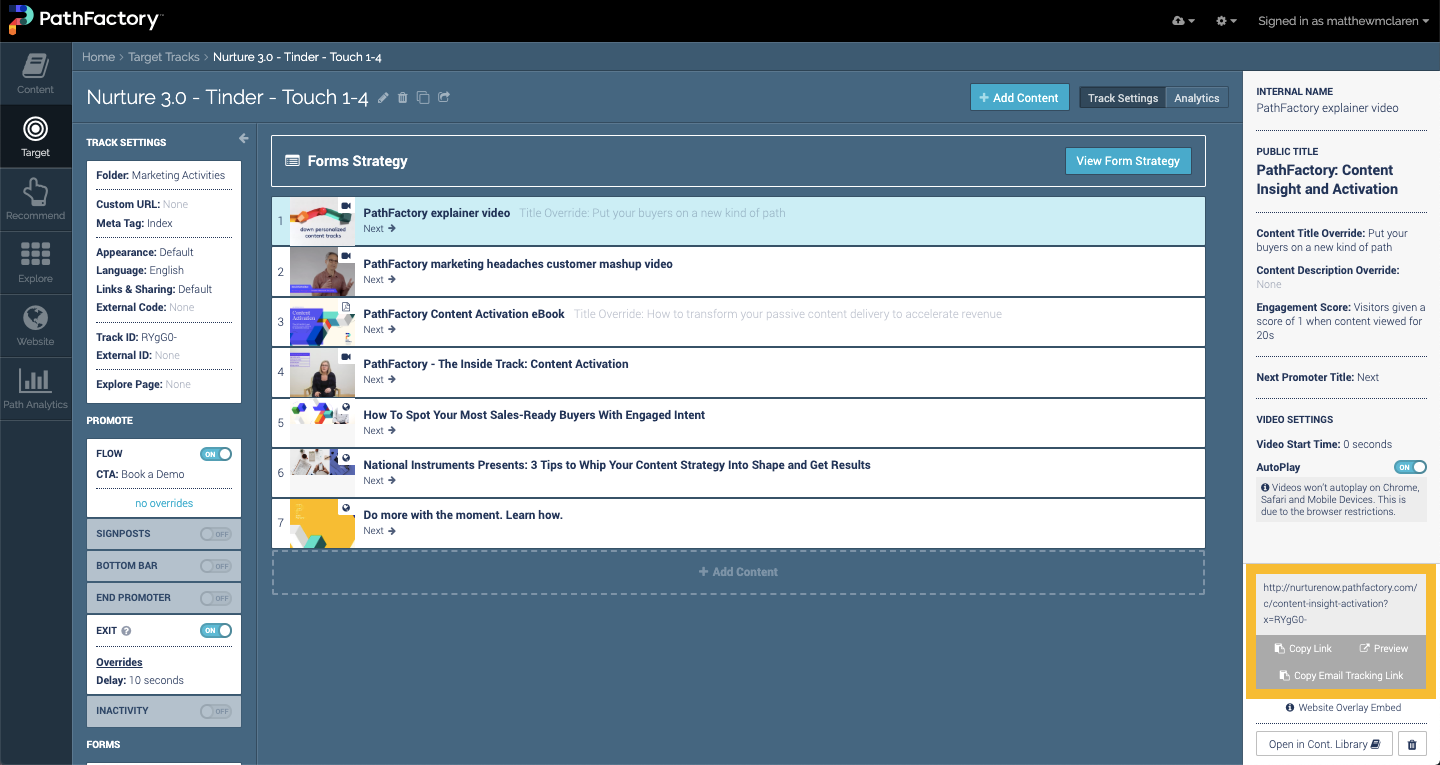 Selecting an Asset
To find your Custom URL Slug, you can copy it from your Asset URL within your Content Track (highlighted below).
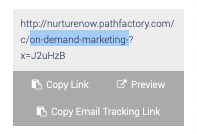 Custom URL Slug
Programs
Now that your nurture Emails are planned out, it’s time to start building in Marketo.
Let’s start by creating the Engagement Program.
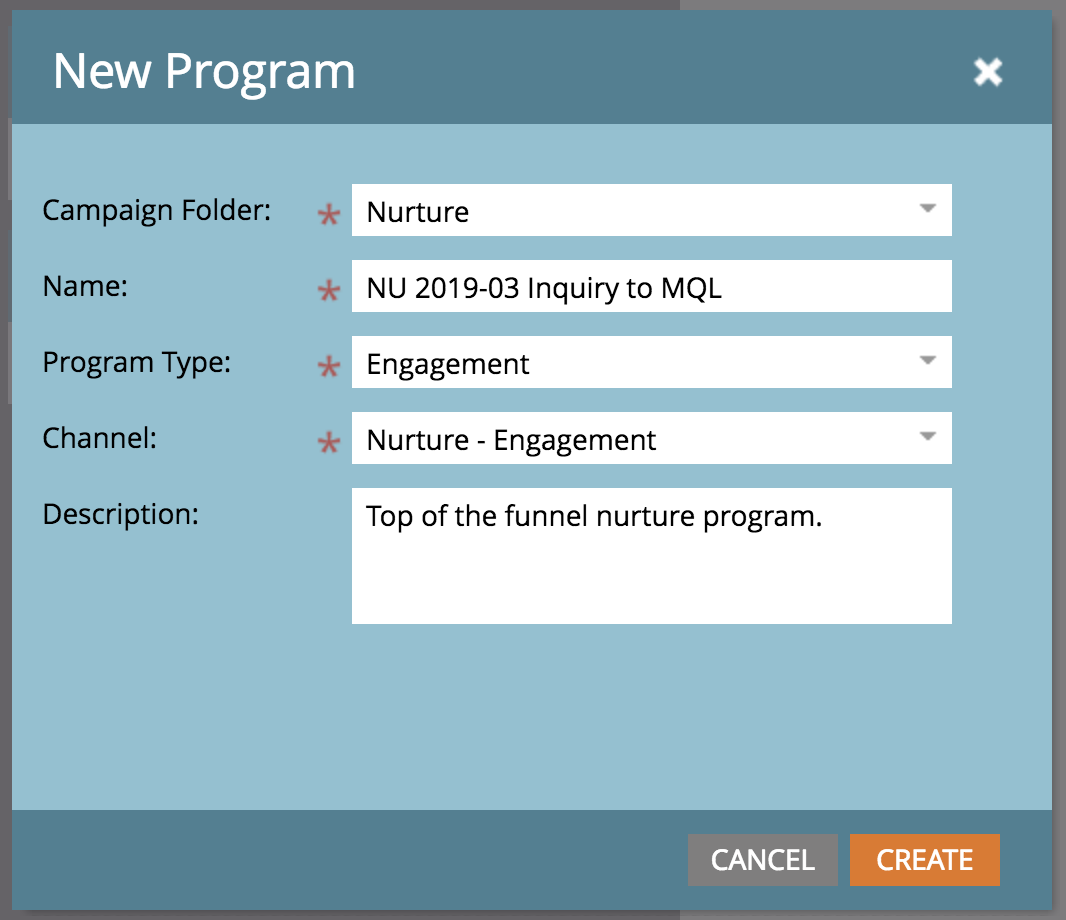 New Program menu
Next, we’ll build our nested Programs.
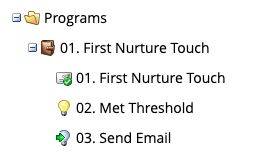
Your Engagement Program will have a nested Program for each nurture Email. Each nested Program has 3 local assets:
- An Email
- A Smart Campaign to monitor engagement, and
- A Smart Campaign that sends your email
Here’s what each nested Program should look like:
Email – 01. First Nurture Touch
When building out your Email you’ll want to make sure to use the Email Tracking Link you copied earlier. Here’s an example from our Marketing:
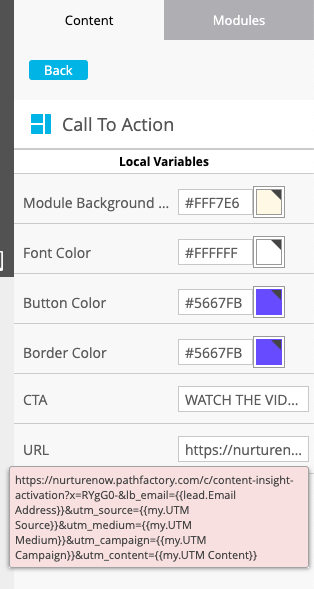 Email Tracking Link example
|
Note
|
Pro Tip: An easier way to manage UTMs in your Nurture is to create them as Tokens. Start by creating a Text Token for UTM Source, UTM Medium and UTM Campaign in the My Tokens section of your Engagement Program. Then, create a Text Token for UTM Content in the My Tokens section of each nested Program. If you’re looking for an easy way to build and manage your tracking links, check out our UTM Tracker Template. |
Smart Campaign – 02. Met Threshold
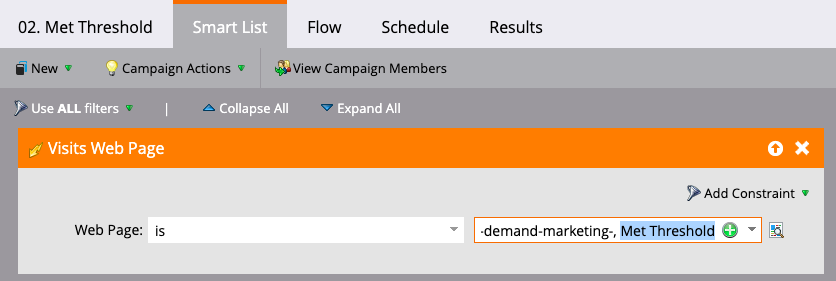
This Smart Campaign plays an important role in our skip logic. Leveraging the PathFactory integration, we’re going to look for anyone who’s engaged with the content in our nurture Email. Here’s how we do it:
Smart List
 Smart List tab
Trigger – Visits Web Page
This where you’ll want to paste the Custom URL Slug you copied earlier and choose the full URL with the Met Threshold tag added to the end. This is the entire URL in the example above:
nurturenow.pathfactory.com/c/on-demand-marketing-, Met Threshold
|
Note
|
If you’re unfamiliar with the Met Threshold tag, you can learn more about it in this Nook article. |
Flow
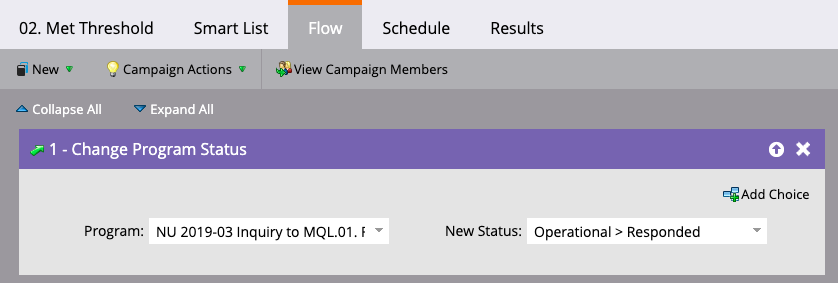 Flow tab
1 – Change Program Status
This is the key to our Skip Logic. When someone meets the criteria we set in the previous step, we want to make them a member of our nested Program. When a person is a member of the nested program, they won’t receive the Email associated to that program. Instead, they are sent the next piece of content.
You may have noticed that we didn’t add any filters to the Smart List section of this Smart Campaign. By not adding any additional filters, we’re still capturing engagement for people not currently in our Engagement Program. Therefore, if they are added to this Engagement Program in the future, we’ll only show them content they haven’t seen.
Schedule
We want people to run through this flow once.
Smart Campaign – 03. Send Email
This Smart Campaign is what the Engagement Program will look to when sending your Email.
Smart List
 Smart List tab
1 – Member of Engagement Campaign
Marketo requires that we use a Member of Engagement Program filter in our Send Email Smart Campaign.
Flow
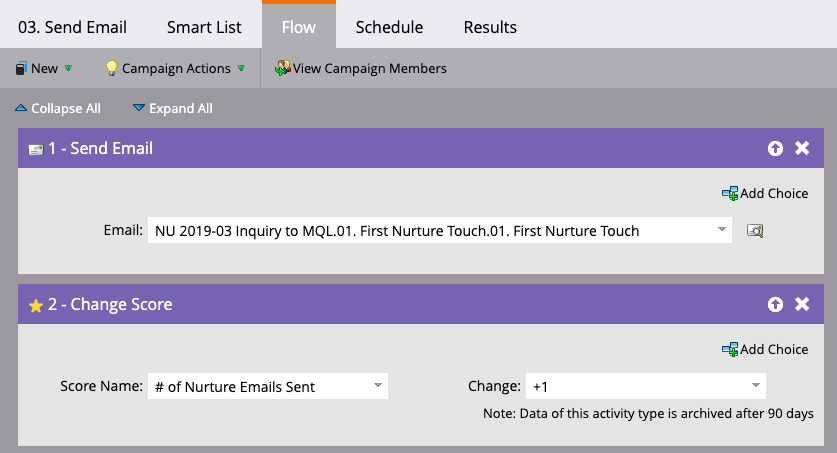 Flow tab
1 – Send Email
Associate the Email you created earlier to send the right content when this Smart Campaign is triggered.
2 – Change Score
This is a key step in powering our Dynamic Cadence. We’re leveraging our newly created Score Field (# of Nurture Emails Sent) to keep track of the number of emails a person has been sent while a member of our Engagement Program. You’ll see how this all fits together in the Smart Campaigns section.
Schedule
Don’t worry about setting a schedule for this Smart Campaign, we’ll take care of that when setting up our Streams.
Next Steps
Now it’s time to build out the rest of your nested Programs. Follow the steps above to create a new nested Program for each of your remaining Nurture Emails.
Streams
Now that all your nested Programs are built out, you’ll want to add your nested Programs to the Streams section of your Engagement Program. By the time you’re done, you’ll have built out your Dynamic Cadence, and your Engagement Program Streams will look like this:
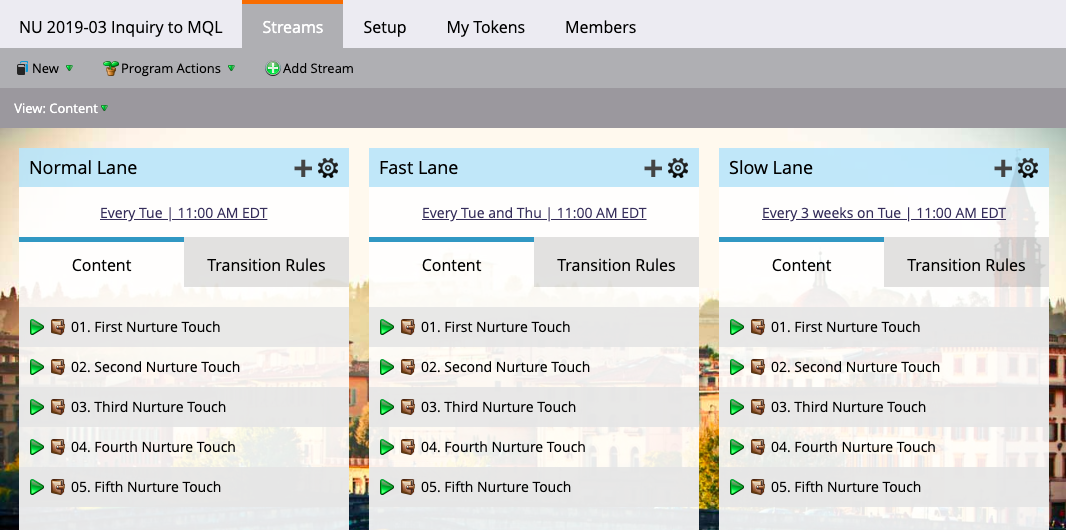 Nested Programs
When adding your nested Program to your Stream, you’ll want to make sure you choose Program as your type, your nested Program as your Program, and your Send Email Smart Campaign as your Smart Campaign.
|
Note
|
Pro Tip: We recommend you start by building only your first Stream, activating the content, and then cloning it to create your other two Streams. |
Setting your cadence is really up to you, but we’ve found that 11:00AM is the best time for sending emails in our organization.
Smart Lists
In this section, we’ll build out the logic for our Dynamic Cadence. Start by creating 2 new Smart Lists:
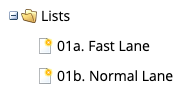
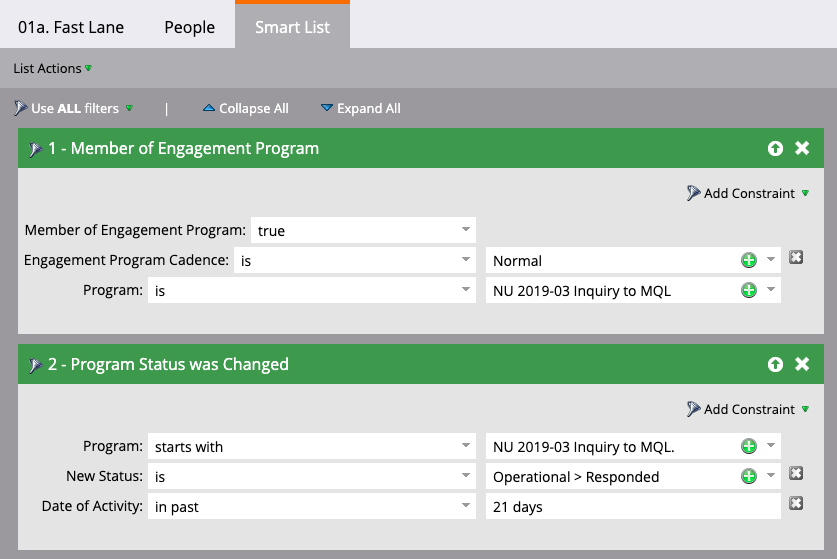
Smart List – 01a. Fast Lane
Smart List
 Smart List tab
1 – Member of Engagement Campaign
We want to make sure that anyone in our Fast Lane Smart List is a member of our Engagement Program.
2 – Program Status was Changed
Remember when we built out our nested Programs? We had a Smart Campaign that changed a person’s status to Responded when they engaged with our content. The purpose of this filter is to look for anyone who has engaged with our content in the past 21 days. By using the “starts with” operator you can easily target all your nested Programs (instead of selecting each one).
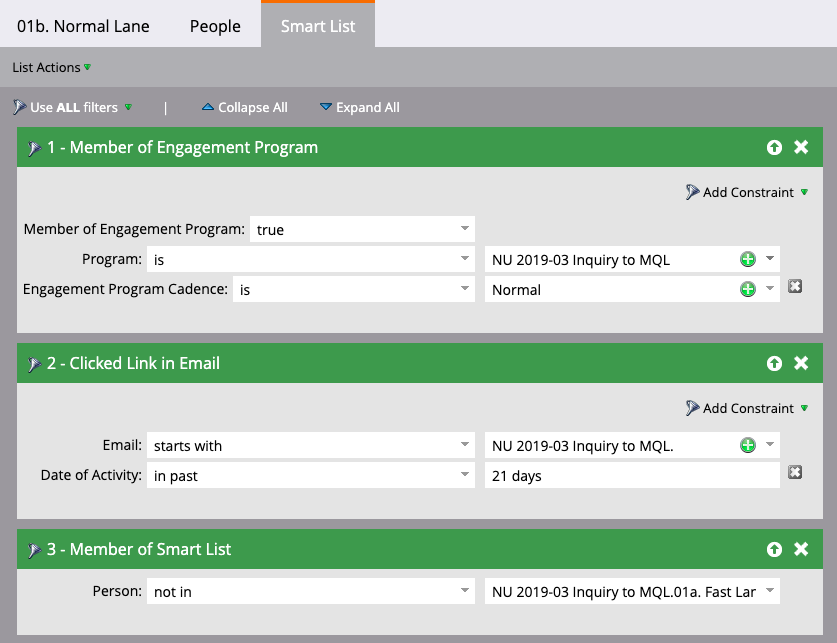
Smart List – 01b. Normal Lane
Smart List
 Smart List Normal Lane tab
1 – Member of Engagement Program
We want to make sure that anyone in our Normal Lane Smart List is a member of our Engagement Program.
2 – Clicked Link in Email
To be a member of our Normal Lane, someone has to at least clicked a link in one of our Nurture Emails in the past 21 days.
3 – Member of Smart List
With this filter we’re excluding anyone who qualifies for our Fast Lane Smart List.
Smart Campaigns
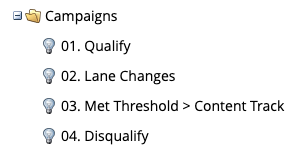
Now let’s build out our Smart Campaigns. This is where all our previous work comes together. Let’s start by creating 4 new Smart Campaigns:
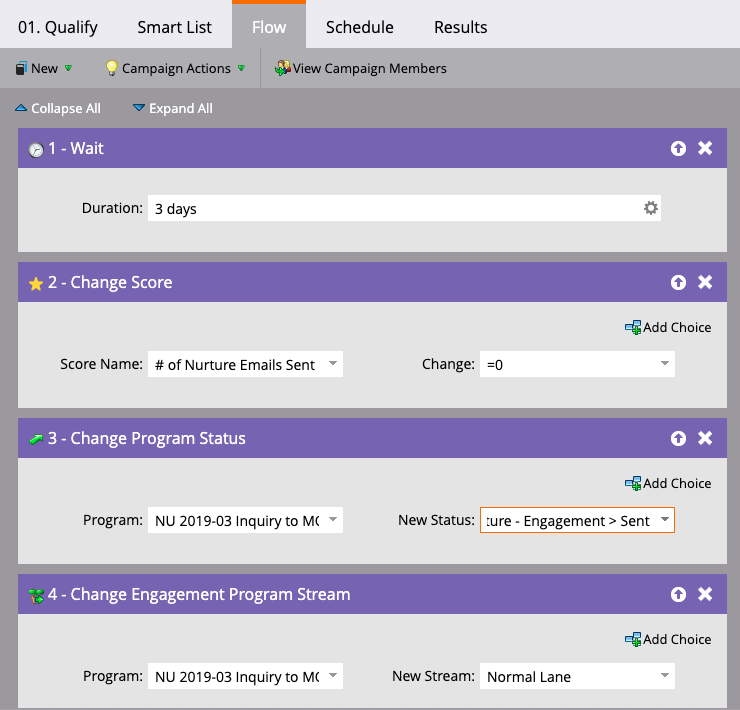
Smart Campaign: 01. Qualify
Smart List
The purpose of this Smart Campaign is to add people to your Engagement Program. Depending on your Engagement Program, you would add the necessary Triggers and Filters to do so.
Flow
 Flow tab
1 – Wait
This Wait step really depends on the purpose of your Engagement Program. In this Top of the Funnel Engagement Program example, we decided to wait 3 days before adding someone to our Engagement Program.
2 – Change Score
In a situation where you have multiple Engagement Programs running simultaneously (like we do in our Marketing), it’s best to reset your # of Nurture Emails Sent Score Field to 0 when someone begins a new Engagement Program.
3 – Change Program Status
Anyone who qualifies for our Engagement Program becomes a member of that Engagement Program.
4 – Change Engagement Program Status
We’re making sure that anyone who enters our Engagement Program starts in the Normal Lane.
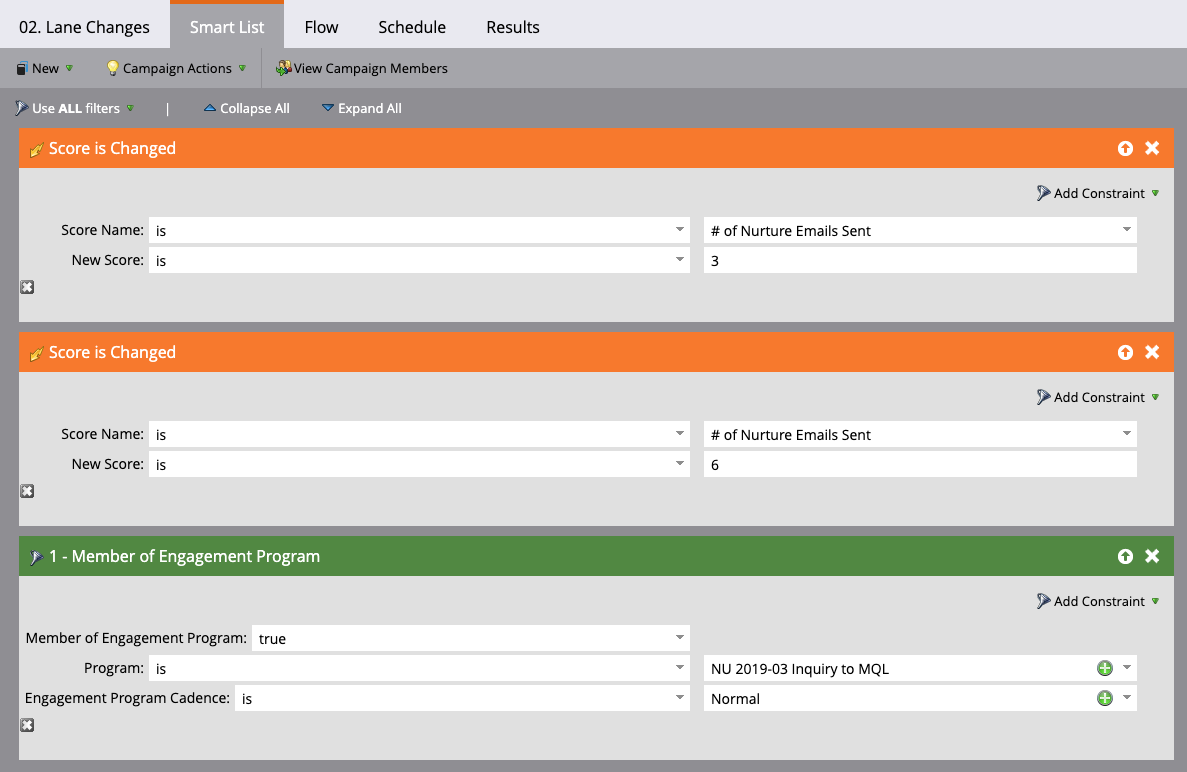
Smart Campaign: 02. Lane Changes
This Smart Campaign powers our Dynamic Cadence.
Smart List
 Smart List tab
Trigger: Score is Changed
Setting up these triggers really depends on how many Emails are in your Engagement Program. In our Marketing, we re-evaluate which Stream a person should be in every 3 emails.
Filter: 1 – Member of Engagement Program
We want to make sure that anyone who runs through this Smart Campaign is a member of the Engagement Program.
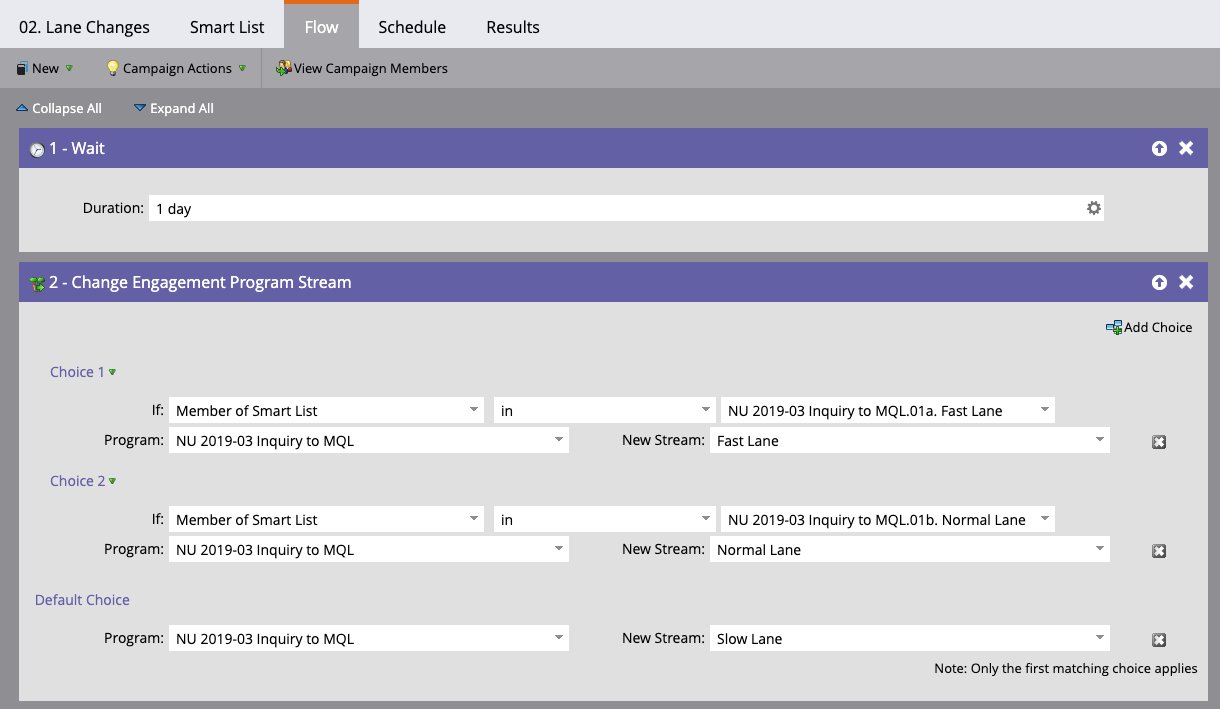
Flow
 Flow tab
1 – Wait
Since this Smart Campaign triggers immediately after a person is sent Email 3 or 6, we give them an additional 1 day to engage with that content before evaluating which Stream they should be in.
2 – Change Engagement Program Status
Now we leverage the Smart Lists we created earlier to determine which Stream a person should be in.
If someone is:
- A member of our Fast Lane Smart List, make them a member of the Fast Lane Stream
- A member of our Normal Lane Smart List, make them a member of the Normal Lane Stream
- Not in our Fast Lane Smart List or our Normal Lane Smart List, make them a member of the Slow Lane Stream
Schedule
We want people to run through this flow every time.
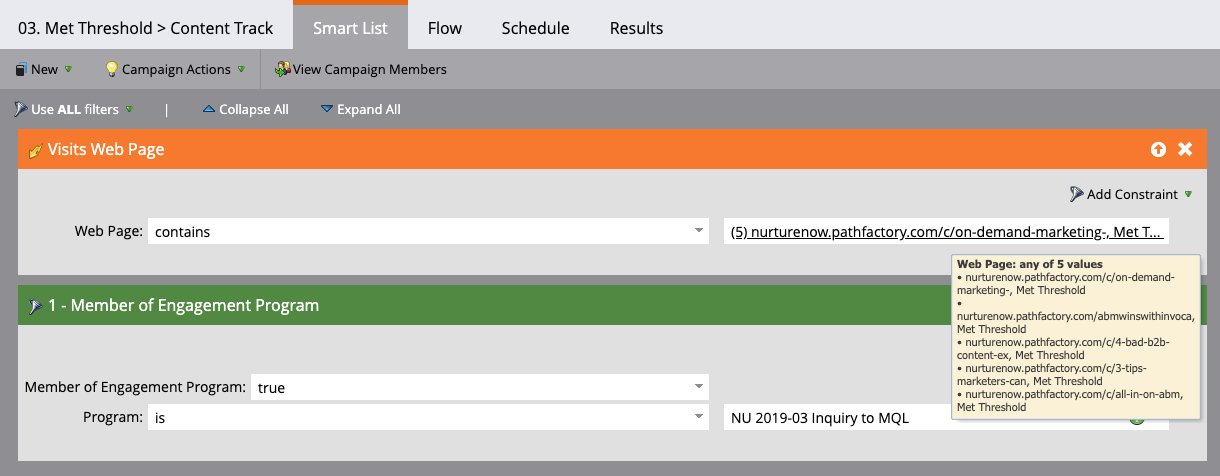
Smart Campaign: 03. Met Threshold > Content Track
This Smart Campaign looks for engagement across your entire Engagement Program.
Smart List
 Smart List tab
Trigger – Visits Web Page
This where you’ll want to paste the Custom URL Slugs you copied earlier for all your nested Programs and choose the full URL with the Met Threshold tag added to the end.
1 – Member of Engagement Program
We want to make sure that anyone who runs through our Smart Campaign is a member of our Engagement Program.
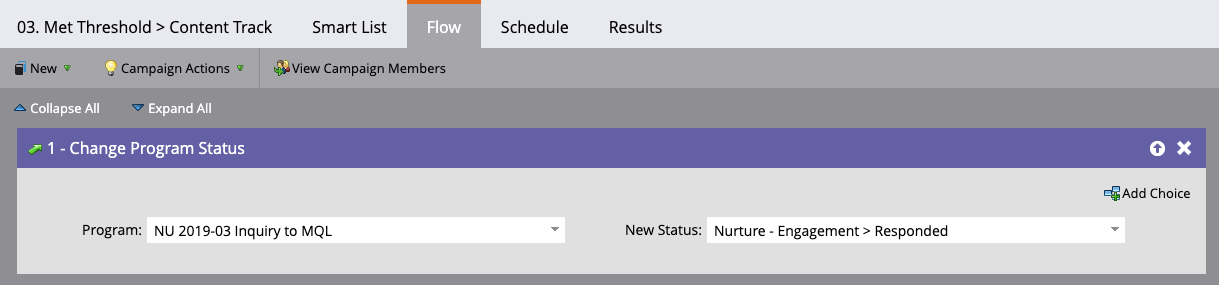
Flow
 Flow tab
1 – Change Program Status When someone engages with any of the content in our Engagement Program we want to change their status to Responded. This will be helpful for any reporting in Marketo.
Schedule
We want people to run through this flow once.
Smart Campaign: 04. Disqualify
Smart List
The purpose of this Smart Campaign is to remove people from your Engagement Program. Depending on your Engagement Program, you would add the necessary Triggers and Filters to do so.
Flow
 Flow tab
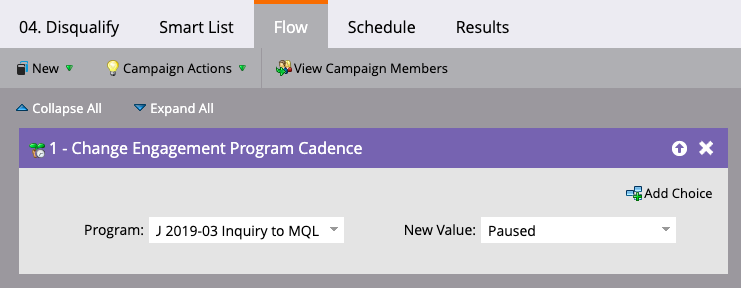
1 – Change Engagement Program Cadence
When someone meets the criteria for Disqualification from your Engagement Program, we want to change their cadence to Paused so they won’t receive any additional emails.
Schedule
We want people to run through this flow every time.
Add-on: Persona Personalization
Personalization start with building the right segment. Some common ways Marketers segment are by Persona, Funnel Stage, Industry, Company Size, Tech Installed, Content Interests, etc..
In this example, we’ll teach you how to easily personalize your Emails by Persona. We’ve made this change in our own Marketing and seen significant lifts in engagement with our Emails and Content.
|
Note
|
If you’re unfamiliar with Marketo Segmentation, feel free to read through their documentation. |
We’re going to first start by building our Segment in Marketo. In your Lead Database, you’ll see a folder called Segmentations. Right click the Segmentations folder and create a New Segmentation.
 Segments in Marketo
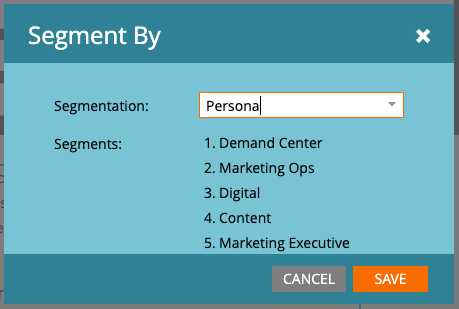
Next, add your Segments. In this example we’ve used some basic Marketing Personas:
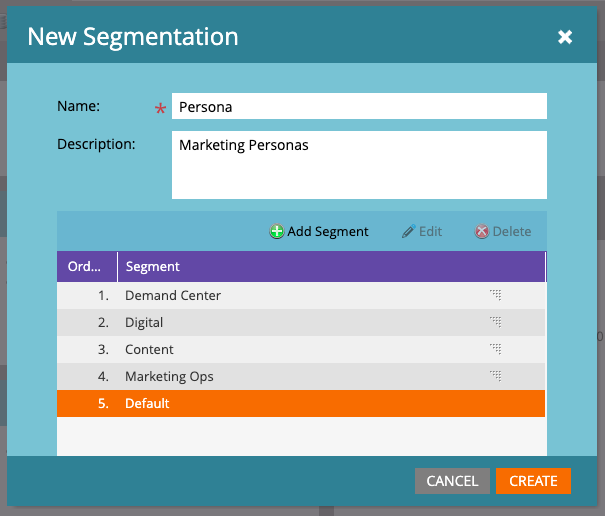 New Segmentation menu
Once you’ve created your Segmentation, you’ll be able to click into each Segment and define its Smart List:
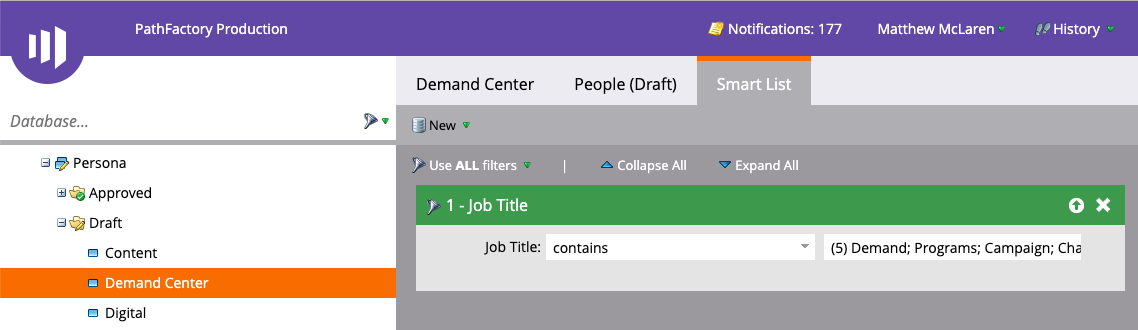 Smart List tab
Once you’ve defined the Smart List for all your Segments, you’ll need to Approve your new Segmentation:
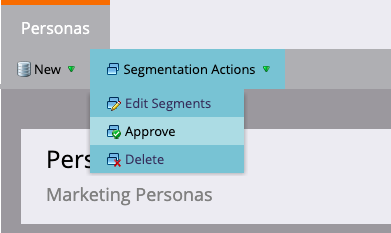 Approve the new Segmentation
Now that we have our new Segmentation, we can dynamically change the content of our Emails based on each Segment.
In an Email, you can use Dynamic Content to personalize the:
- From Name
- From Email
- Reply-to Email
- Subject Line
- Images
- Text
In this example, we’re going to personalize the Subject Line. In your Email editor, on the right of your Subject Line, you’ll have an option to Make Dynamic:
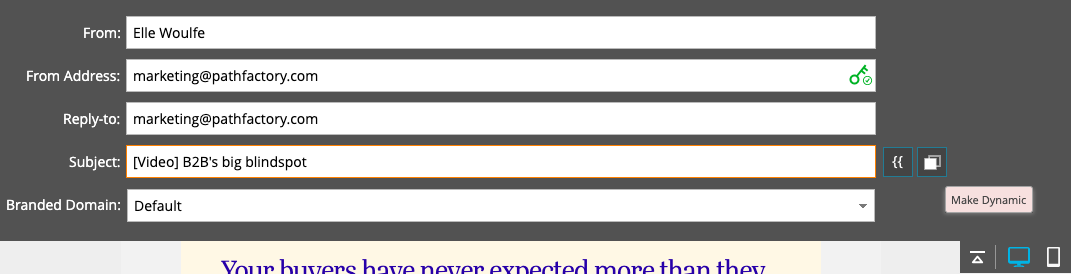 Make Dynamic button
Choose your Segmentation and select Save:
 Save button
Under the Dynamic section of your Email editor, you can now select your Segment and change the content of your Subject Line by Persona:
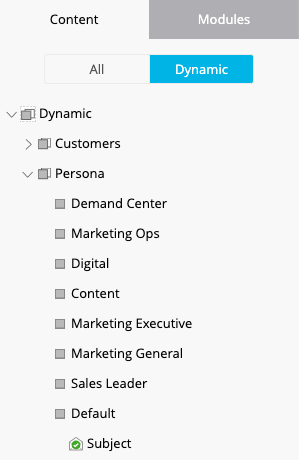 Dynamic menu
After you’re done personalizing your Subject Line, feel free to preview your Email to see your Segmentation in action.
Here’s our subject line for Marketing Ops:
 Example of a subject line
And for Demand Center:
 Example of a subject line